AudioTools stores data internally in a binary format, for displaying graphs. These files are not the same as the tab-delimited XLS files that are exported from the app to your computer. It is possible to transfer the binary files from one iOS device to another.
If you are storing files internally on the iOS device, use these steps to move a data file from one copy of AudioTools to another one on a different iOS device.
Note that you can enable iCloud, and all of the stored files will automatically be available on all of your iOS devices. You can also turn on iCloud mode, and then use the Migrate Files function to move all of the files that are stored locally to iCloud, and then after iOS completes the synchronization process, they will be available on all of your devices. For more about iCloud mode, see this page.
In this example, we will be moving an RTA file from an iPhone to an iPad.
Extract the Files
First, extract the files from the iPhone, which is the source iOS device, using iTunes file sharing.
- Connect the iPhone to iTunes
- Go to the Apps section for the device in iTunes
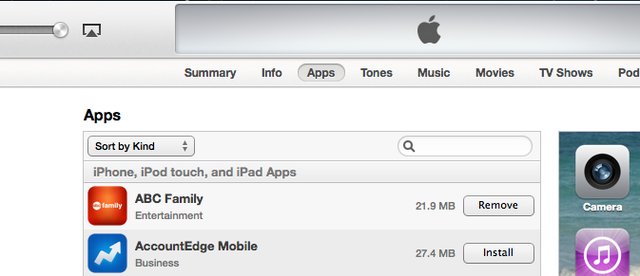
- Scroll down to the File Sharing section.
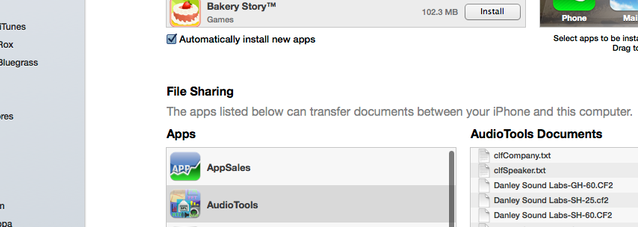
- Select the AudioTools app
- In the AudioTools Documents section, drag the folder containing the desired files to your desktop.
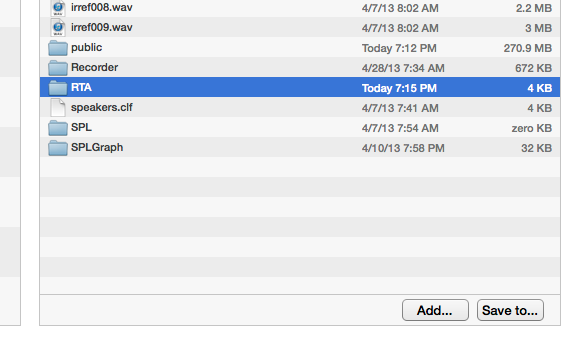
Note: you are looking for the folder with the .bin files in it, NOT the public folder. In this example, drag the RTA folder to the desktop.
Copy The Files To The Target iOS Device
Some file types have only a .bin file, others have both a .bin file and a .hdr file. Move both the .bin file and .hdr file (if present) to the target device, in this case the iPad. To do that, follow these steps:
- Open AudioTools on the iPad, and make sure it is connected to the same WiFi network as the computer that has the RTA folder
- Open the module for the file type that you wish to import. In this example, open RTA.
- Tap the square icon to go to the Save / Recall screen
- Click Export to open the Files window.
- Open a browser on your computer.
- In the browser, enter the URL that is shown on the iOS device File window to bring up the file interface.
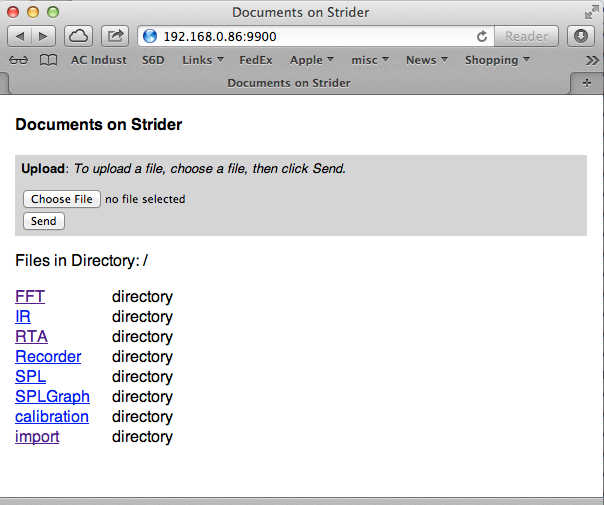
- Click on the import folder to select the destination for the files.
- In the browser, click Choose File in the Upload section, and select the file you wish to copy to the Import folder from the RTA folder on the desktop.
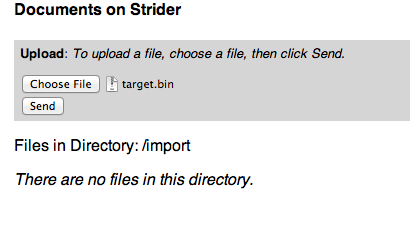
- Click Send to copy the file the to iOS device. This will move the file to the Import folder on the iPad, where any module can retrieve it.
Import the file
The last step is to move the imported files from the import folder, to the RTA data file folder. Follow these steps on the iPad:
- Exit the Files screen to get back to the Save / Recall screen
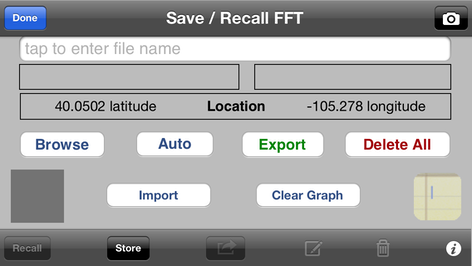
- Select the Import button.
- Tap the file that you wish to import and tap Import, or select Import All if you want all the files that are in the list.
- Tap the Browse button to bring up the file list.
- Recall your imported file.