AudioTools supports importing a file containing frequency response data for a microphone, and that response curve will be applied to the microphone in many AudioTools modules. The microphone response correction data will be applied in all modules that display frequency dependent information: RTA, FFT, SoundScope VR, and Transfer Function. Note that it will NOT be applied to basic SPL measurements.
How to Apply A Frequency Compensation File
Check below for the correct file format, and how to get the file in the folder that AudioTools uses to apply microphone compensation files, then follow these steps.
Microphone Frequency Compensation File Format
AudioTools supports the pending AES standard for frequency response data (.frd) files, as well as most typical mic cal file formats. Specifically, files that conform to these rules may be read in:
How Files are Parsed and Applied
The maximum resolution of input files that is supported is 1/12th octave, for a maximum of 12 octaves. Files with more resolution will be processed to average the values within each 1/12th octave point.
The algorithm works by starting from the highest frequency in the file and working its way down to the lowest. So, if you add an entry at 951Hz for 10dB, and one at 898Hz for 0, all frequencies from 898Hz to 951Hz will be lowered by 10dB.
Then, depending on the module, the resolution may again be compressed. For example, RTA will process the compensation data appropriately for 1/3 or 1/1 octave mode.
To see how your data file was processed, go to FFT, Settings, and switch from Low to Full mode. When you return to the main screen, before pressing play you will be able to see the actually plot if you scroll down.
Here is an example file to download.
Using iCloud to Import Microphone Compensation Files
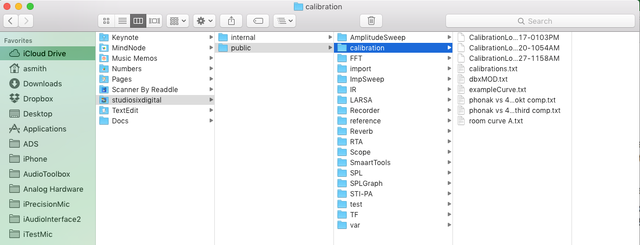
Using iCloud is the easiest way to import files, and provides more advantages such as the ability to share files between devices. First, setup iCloud by following these instructions. Then, on your computer, navigate to the iCloud folder “calibration”, under public. If the folder does not exist, create it.
Next, copy your compensation file to the calibration folder. The next time you go to AudioTools, Settings->Microphone Setup, select your microphone by tapping the small “i”, and then tap the “Calibration File” button, you will see the file that you added from your computer.
Select the file and the calibration will be applied.
Using the Files app on the iOS Device to Import the Calibration File
Since iOS 11, you will find a Files app on your iOS device. If you are using the internal file storage method rather than iCloud, navigate to the top level in Files, and tap “On My iPhone” (or iPad). From here, you will see a StudioSixDigital folder. Open this, and look for the “public” folder, within it will be the “calibration” folder. This is the place that you can paste or drop the file.
To get the file so that you can paste it there, you could email it to yourself, and in the email select the file and tap Copy from the menu that pops up. Then go back to the “calibration” folder above, hold your finger on the screen for a bit, and tap Paste when the popup menu appears.
Now you can go back into AudioTools and the file will be there to apply.